vscode插件开发(语言类)
目录
- 项目初始化
- 项目介绍
- 如何调试
- 高亮配置
- 自定义主题
- 自动补全
- 打包、本地测试
- 添加插件图标
- 插件名称有undefined
- 结尾
项目初始化
环境
node:16.19.1
npm:8.19.3
windows11
安装脚手架
npm install -g yo generator-code
创建项目
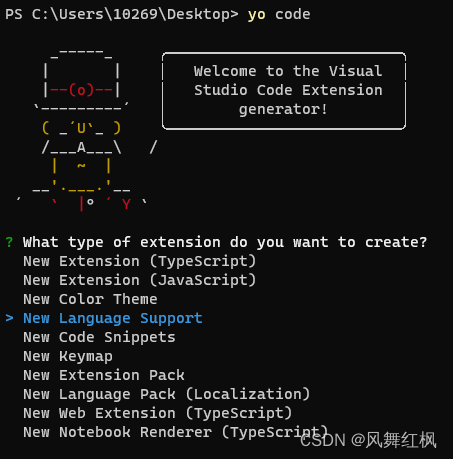
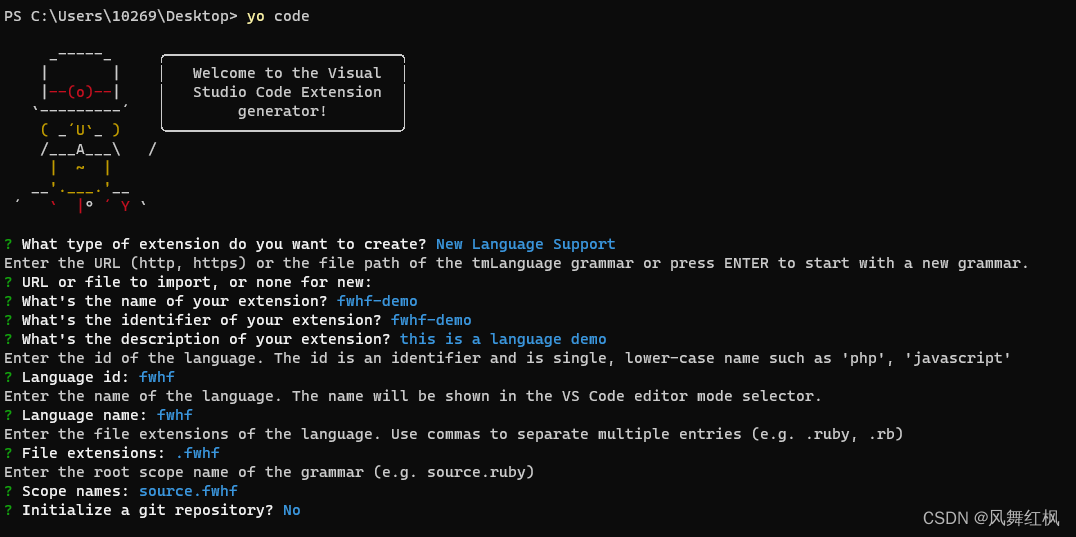
yo code
项目类型:本例选择新语言支持,参考下面两张图
项目介绍
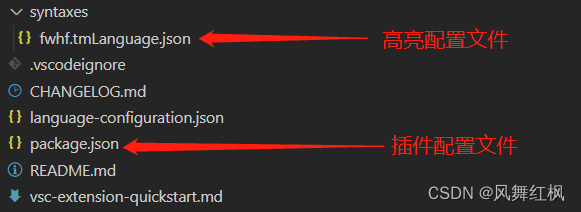
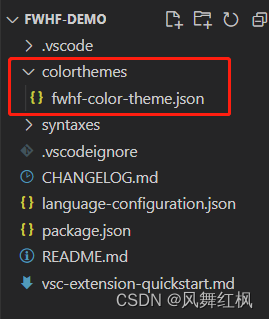
目录介绍
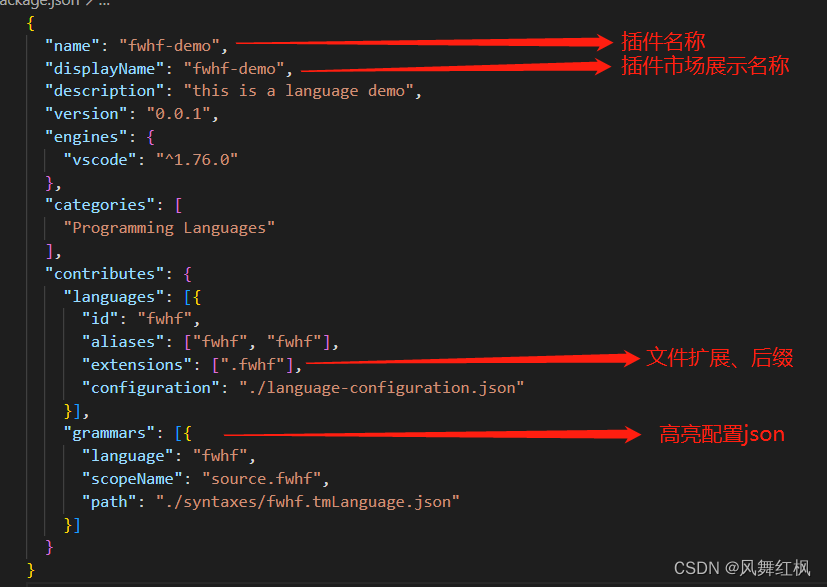
package.json详细介绍
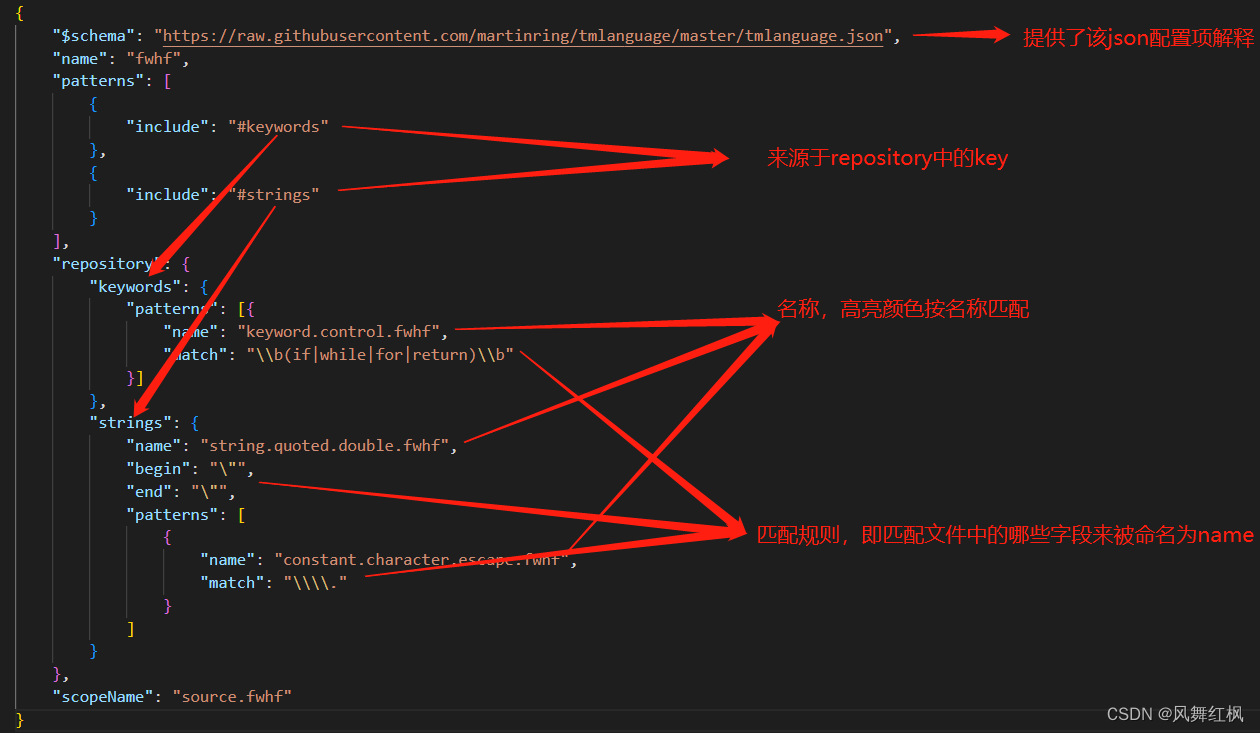
高亮配置json详细介绍,更多可见文件中的json配置项解释,或者点击这里
如何调试

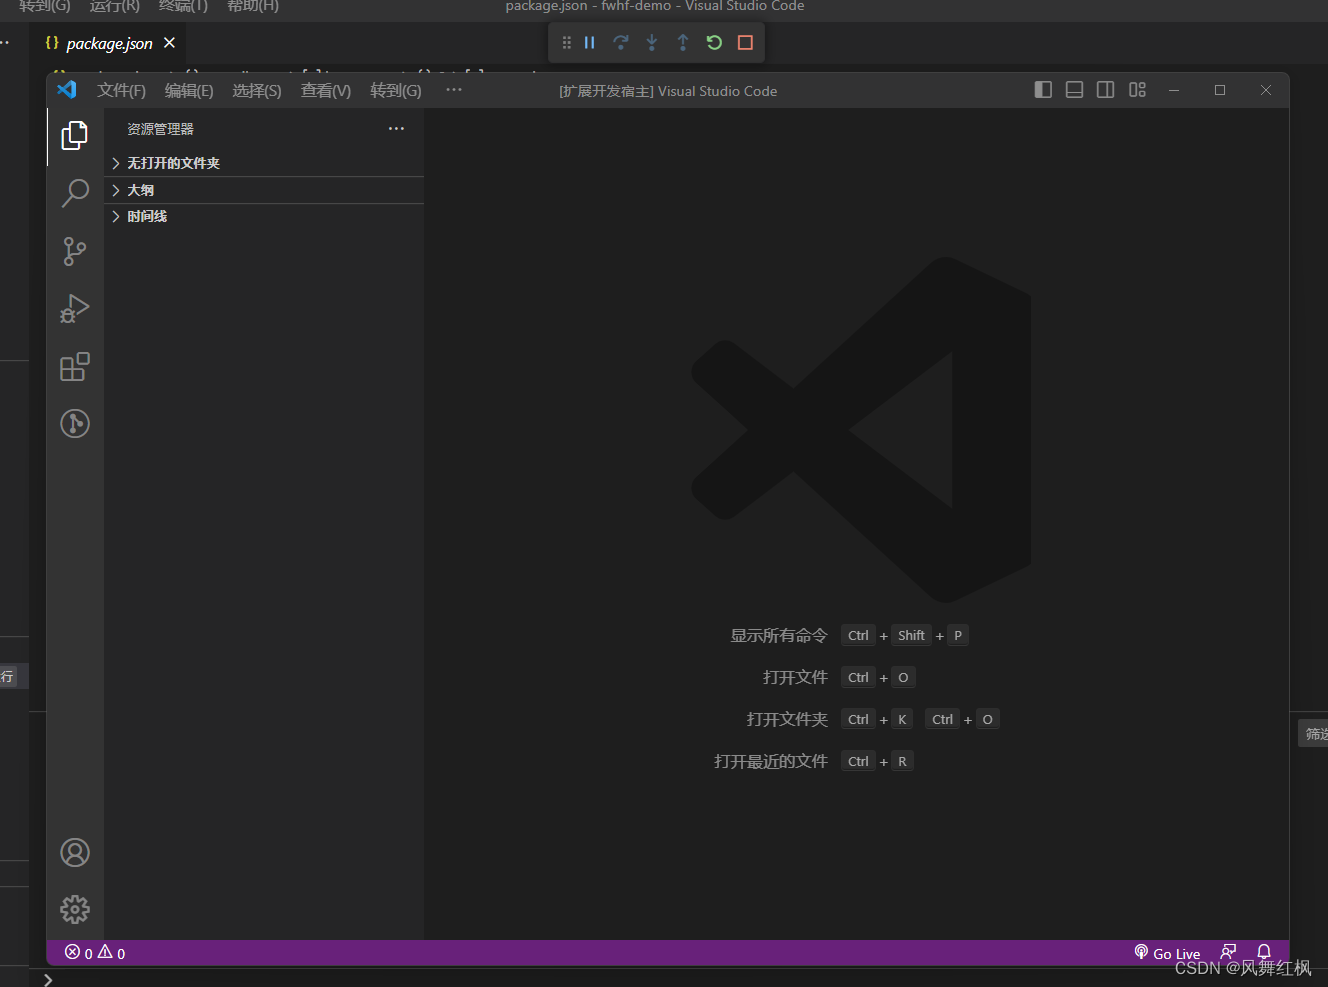
点击绿色三角运行后会自动弹出调试界面
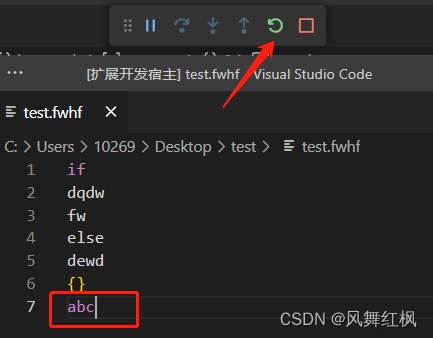
因为在项目初始化/配置中设定了.fwhf的后缀文件,所以咱们可以创建一个test.fwhf文件,并在文件中输入if以及一些其他字符。
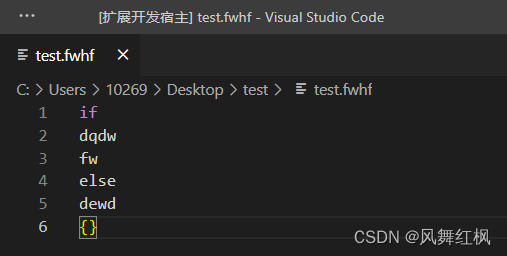
为什么if、{}有颜色,其他的没颜色呢?咱们接着往下看
高亮配置
上文中已经提到过高亮配置文件,咱们一起再看一遍。
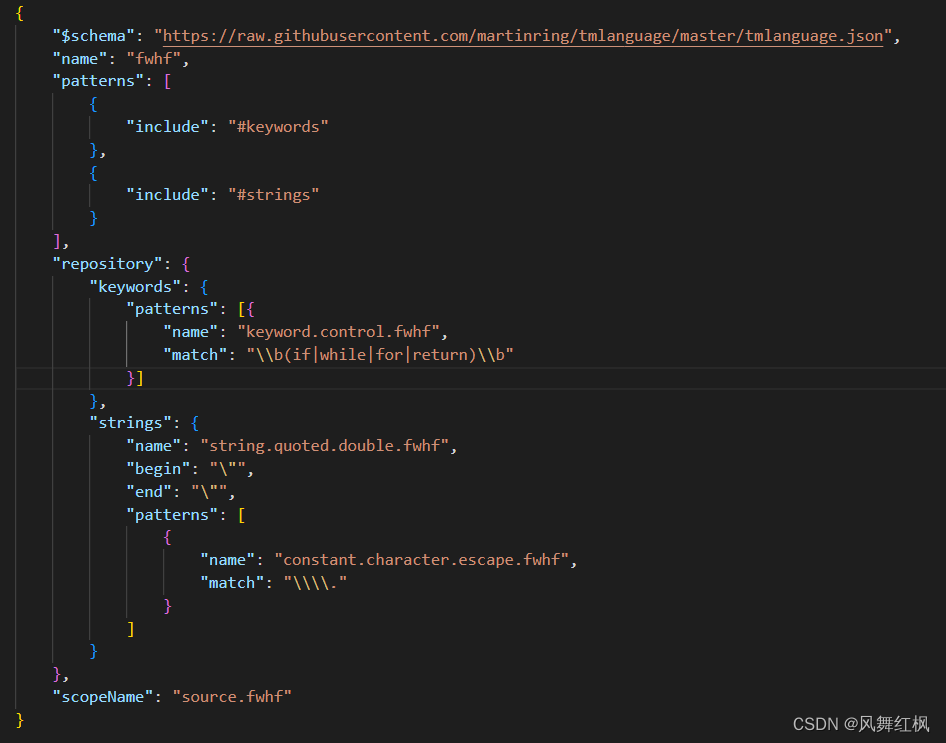
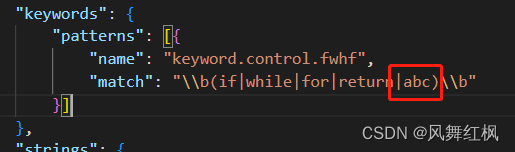
不知道有没有小伙伴看到keyword下的match匹配中出现了if,那我们尝试在match中加入abc,重新运行,并在test.fwhf中写入abc观察是否会变色。
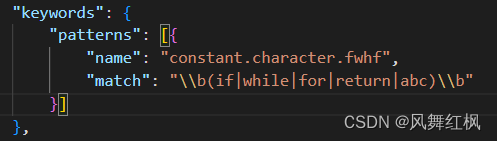
完美!现在都是紫色(不同的vscode主题可能表现不一致),那我们想要别的颜色怎么办?在上文高亮配置json详细介绍中提到高亮颜色按名称匹配,那我们尝试修改name试试(这里需要特别注意,name要选择配置json链接内推荐选项,否则需要添加自定义主题文件,下文介绍)。
"enum": ["comment","comment.block","comment.block.documentation","comment.line","comment.line.double-dash","comment.line.double-slash","comment.line.number-sign","comment.line.percentage","constant","constant.character","constant.character.escape","constant.language","constant.numeric","constant.other","constant.regexp","constant.rgb-value","constant.sha.git-rebase","emphasis","entity","entity.name","entity.name.class","entity.name.function","entity.name.method","entity.name.section","entity.name.selector","entity.name.tag","entity.name.type","entity.other","entity.other.attribute-name","entity.other.inherited-class","header","invalid","invalid.deprecated","invalid.illegal","keyword","keyword.control","keyword.control.less","keyword.operator","keyword.operator.new","keyword.other","keyword.other.unit","markup","markup.bold","markup.changed","markup.deleted","markup.heading","markup.inline.raw","markup.inserted","markup.italic","markup.list","markup.list.numbered","markup.list.unnumbered","markup.other","markup.punctuation.list.beginning","markup.punctuation.quote.beginning","markup.quote","markup.raw","markup.underline","markup.underline.link","meta","meta.cast","meta.parameter.type.variable","meta.preprocessor","meta.preprocessor.numeric","meta.preprocessor.string","meta.return-type","meta.selector","meta.structure.dictionary.key.python","meta.tag","meta.type.annotation","meta.type.name","metatag.php","storage","storage.modifier","storage.modifier.import.java","storage.modifier.package.java","storage.type","storage.type.cs","storage.type.java","string","string.html","string.interpolated","string.jade","string.other","string.quoted","string.quoted.double","string.quoted.other","string.quoted.single","string.quoted.triple","string.regexp","string.unquoted","string.xml","string.yaml","strong","support","support.class","support.constant","support.function","support.function.git-rebase","support.other","support.property-value","support.type","support.type.property-name","support.type.property-name.css","support.type.property-name.less","support.type.property-name.scss","support.variable","variable","variable.language","variable.name","variable.other","variable.parameter"
]
此处我选择了constant.character,重新执行后可见由紫色变为了蓝色。

可能又有细心的小伙伴发现我的name是constant.character.fwhf,而不是constant.character,而且json推荐字段中也没有constant.character.fwhf,为什么还会有颜色呢?那是因为name的匹配规则是按层级优先匹配的,如果constant.character.fwhf匹配不到,他则是匹配上一层的constant.character,如果匹配不到则继续上一层constant,最后都匹配不到则使用默认色,比如上图中的白色。
此处记录几个规则匹配写法,以供大家参考
"keywords": {"patterns": [{"name": "keyword.system.properties.fwhf","match": "\\b(aaa|bbb|ccc)\\b"},]
},
"functions": {"patterns": [{"name": "functions.command.fwhf","begin": "\\b((func1|func2|func3)\\s*\\()","end": "(\\))","beginCaptures": {"1": {"name": "entity.name.class.command"}},"patterns": [{"include": "#expressions"}]},]
},
"symbols": {"patterns": [{"name": "comment.line.fwhf","match": "(\\/\\/.*|\\/\\*.*\\*\\/)"},{"name": "keyword.operator.fwhf","match": "(==|!=|&&|\\|\\||!|\\+|\\-|\\*|\\/|\\%)"},{"name": "string.fwhf","match": "((\"([^\"]*)\")|(\\'([^\\']*)\\'))"}]
},
"numbers": {"patterns": [{"name": "constant.numeric","match": "\\b([0-9]+)\\b"}]
},
"expressions": {"patterns": [{"include": "#keywords"},{"include": "#functions"},{"include": "#symbols"},{"include": "#numbers"}]
}
此处对于上文中的functions特别解释一下,“beginCaptures”的意思是匹配开始的括号,“1”则代表第一个开始括号(包含括号),“patterns”的意思是begin与end之间的内用交给“#expressions”处理。
自定义主题
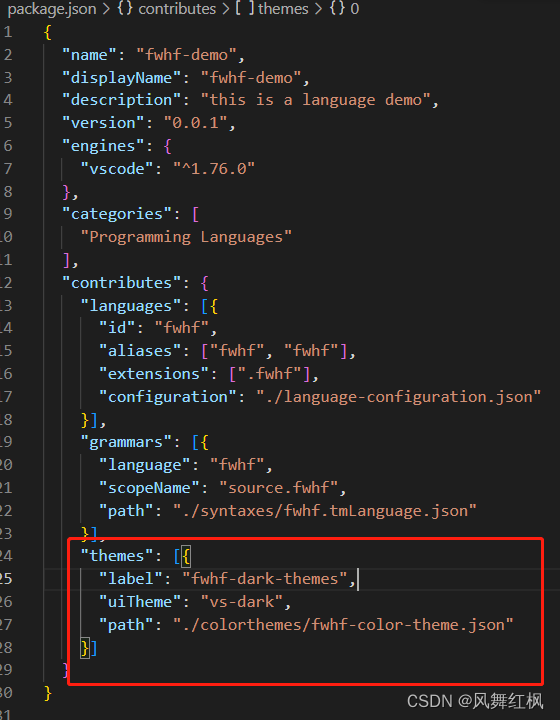
package.json中添加themes字段,并创建对应json
"themes": [{"label": "fwhf-dark-themes","uiTheme": "vs-dark","path": "./colorthemes/fwhf-color-theme.json"
}]
主题json文件详解
{"name": "fwhf.theme","colors": {"editor.foreground": "#fff","editorBracketHighlight.foreground1": "#ffff00","editorBracketHighlight.foreground2": "#00d9ff","editorBracketHighlight.foreground3": "#c300ff",},"tokenColors": [{"scope": ["constant.character.fwhf"],"settings": {"foreground": "#dd0000"}}]
}
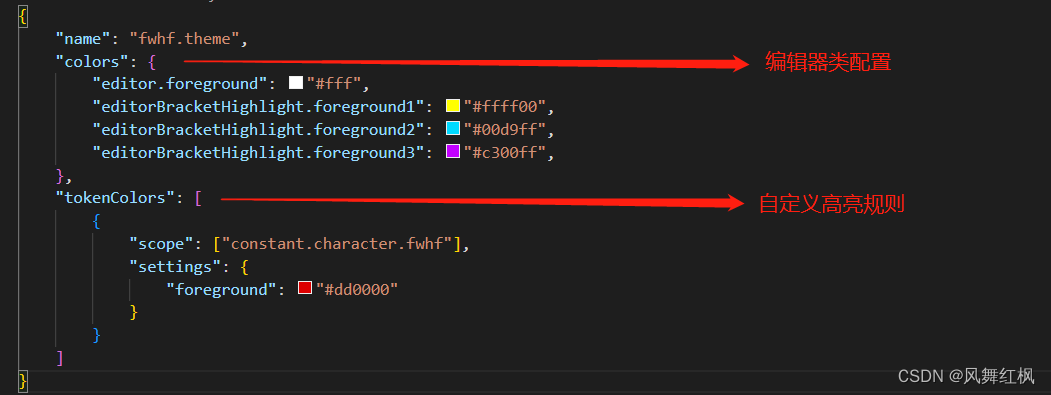
编辑器类配置点击这里查阅更多,自定义高亮规则scope对应高亮配置中的name。让我们一起重新运行,并看看结果吧。
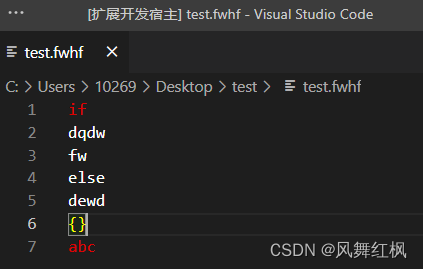
可以看到上图中的 if 和 abc 变为了红色。虽然可以自定义scope,但是我仍然不建议自定义。一但添加了自定义的scope,如果用户在vscode的主题中没有选择该主题,那么意味着scope无效,也将导致对应的高亮规则匹配到的字段将会变成默认色。
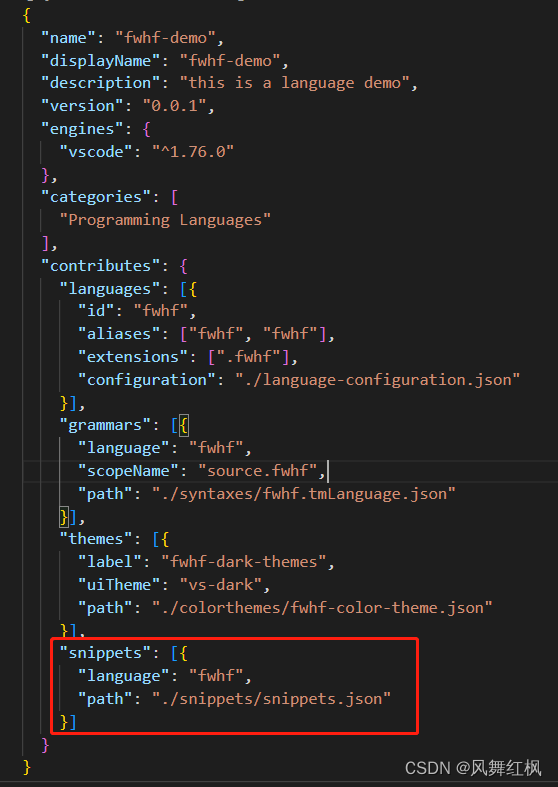
自动补全
package.json中添加snippets字段,并创建对应json
"snippets": [{"language": "fwhf","path": "./snippets/snippets.json"
}]

自动补全json文件详解
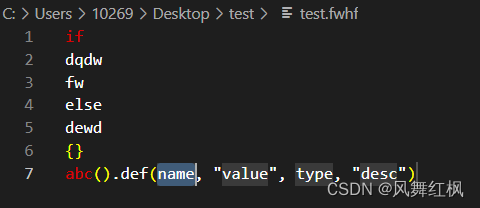
{"abc def": {"prefix": "abc def","body": ["abc().def(${1:name}, \"${2:value}\", ${3:type}, \"${4:desc}\")"],"description": "abc def description"}
}

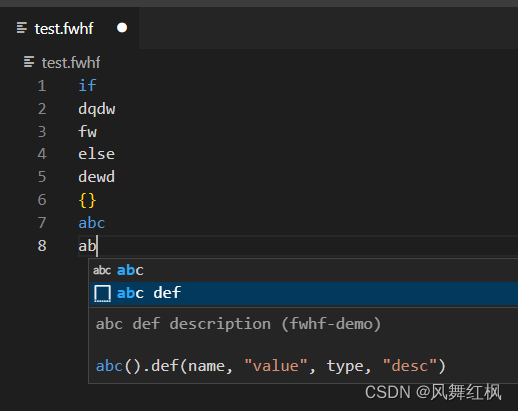
重新运行,并在test.fwhf中输入abc试试吧。

回车即可看到直接写入了我们定义好的语句规则。
打包、本地测试
安装打包工具
npm install -g vsce
项目根目录执行打包命令
vsce package

打开readme文件删除下图中选中部分

重新执行打包命令
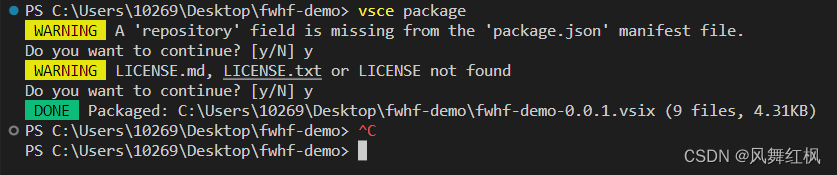

可以看到上图中生成了fwhf-demo-0.0.1.vsix文件,执行下方命令本地安装测试。

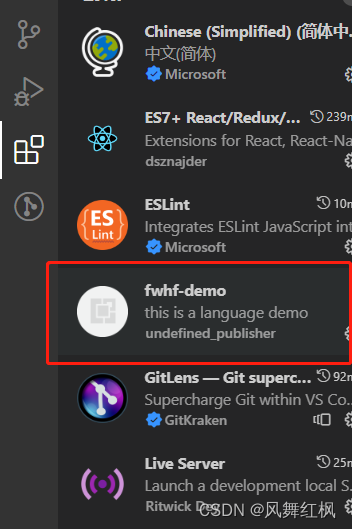
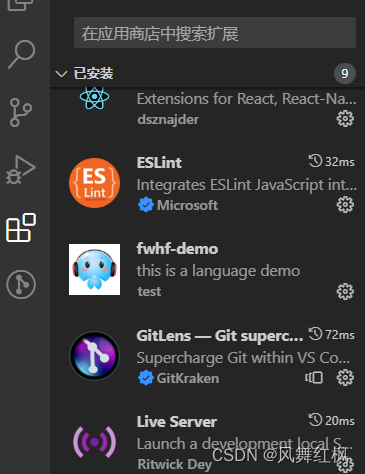
安装成功后是可以在插件栏中显示的
在编辑中直接打开刚才的咱们的test.fwhf,当然也可以新建。可以看到 if 和 abc是蓝色,而非自定义的红色。
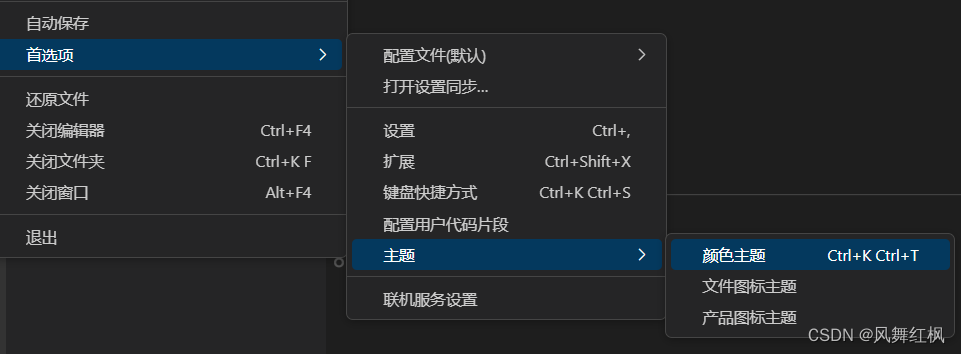
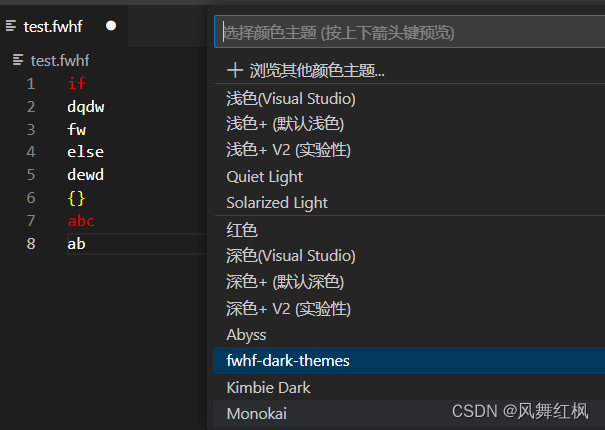
可以在主题中选择自定义主题(文件 、首选项、主题、颜色主题、fwhf-dark-themes)
可以看到颜色变成了咱们的自定义红色
但是你可以看看你的其他文件,是不是颜色都丢失了呢?那自定义主题还有用吗?当然有用,你可以把上文中的推荐字段(或顶层字段)全部定义。当然如果这样做,用户在未选择该自定义主题时,高亮配置自定义name的顶层又不在推荐字段中时,那将意味着你的规则代码片段将使用默认色。
添加插件图标
上图插件列表中可以看到咱们的插件没有图标,那如何增加图标呢?
package.json中添加字段icon,并添加对应图片
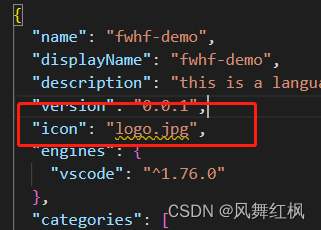
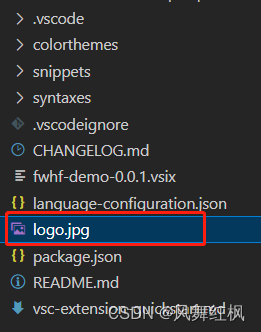
重新打包并安装该插件就有图标啦。
插件名称有undefined
在vscode的已安装插件目录中发现有一个undefined

在package.json中添加字段publisher,并重新打包安装


tips:如果icon和publisher显示有问题,可以尝试先删除已有的该插件再重新安装。
结尾
文章有些长,但是如果需要该类知识还是建议边阅读边跟着操作,相信会对你有不错的提升。