pytest学习和使用22-allure特性 丨总览中的Environment、Categories设置以及Flaky test使用
创始人
2025-06-01 07:27:29
0次
22-allure特性 丨总览中的Environment和Categories设置
- 1 Environment设置
- 1.1 设置方法
- 1.2 创建文件
- 2 Categories设置
- 2.1 设置方式
- 2.2 创建文件
- 3 关于Flaky test
- 3.1 Flaky test介绍
- 3.2 产生Flaky Tests的原因
- 3.3 Flaky安装
- 3.4 Flaky使用
- 3.5 小结
- 小结1
- 小结2
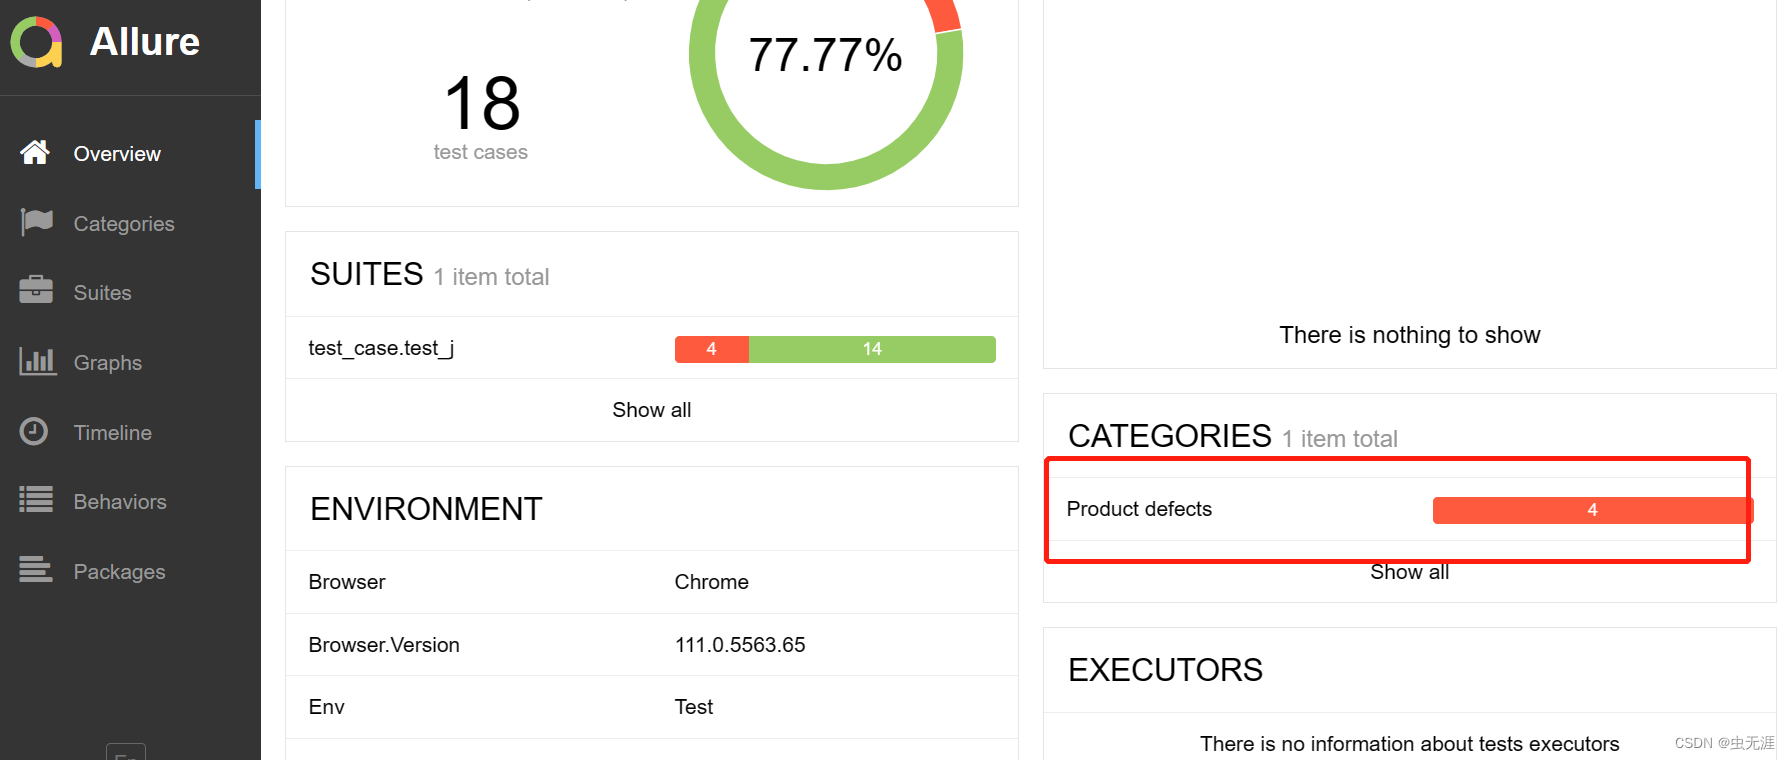
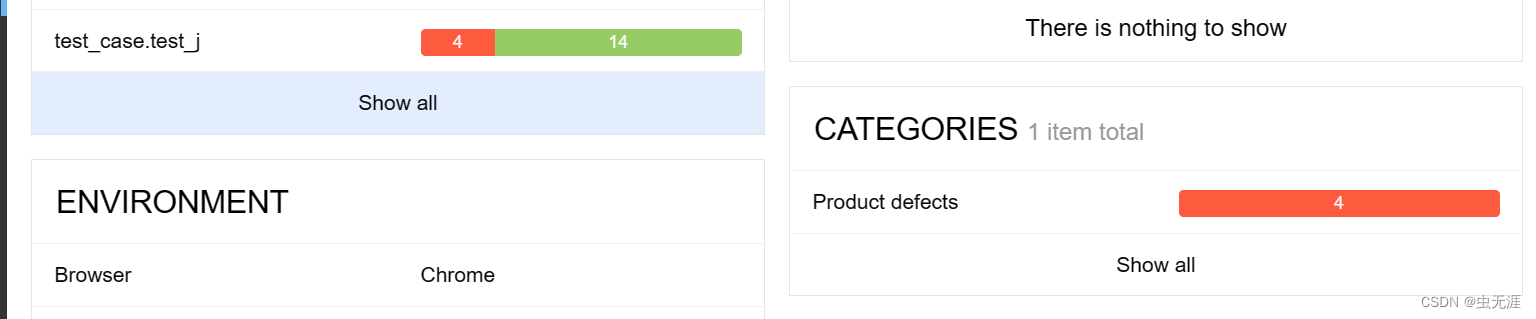
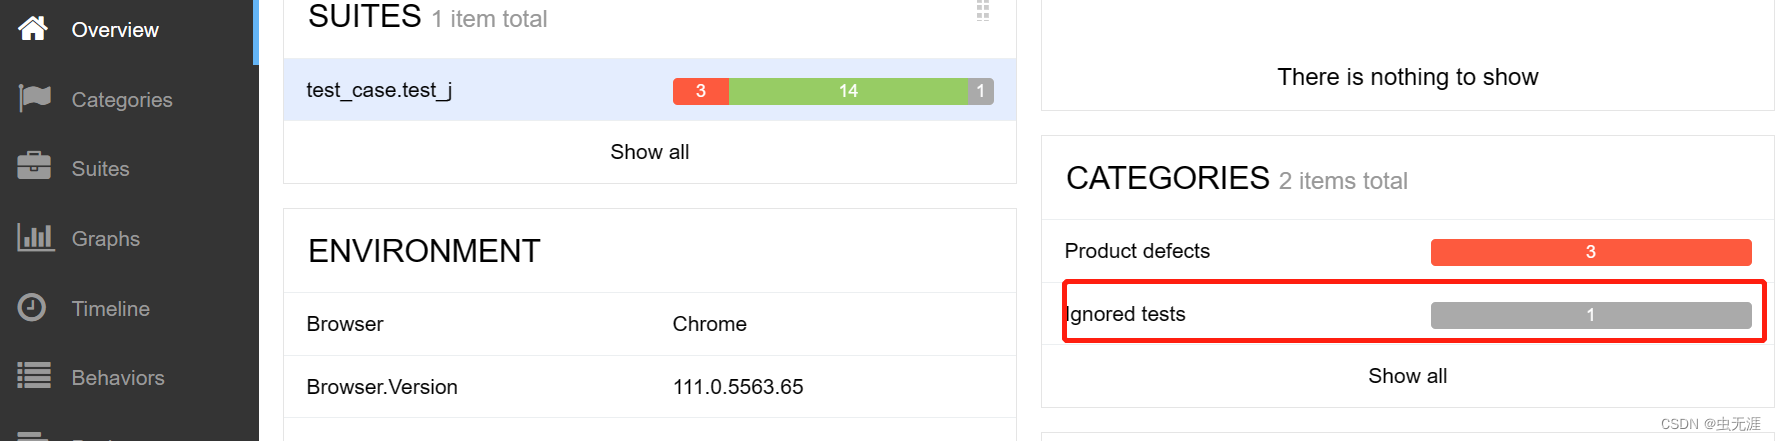
- 如下图,我们可以看到
allure报告的总览,里边的一些特性是可以自定义设置的。
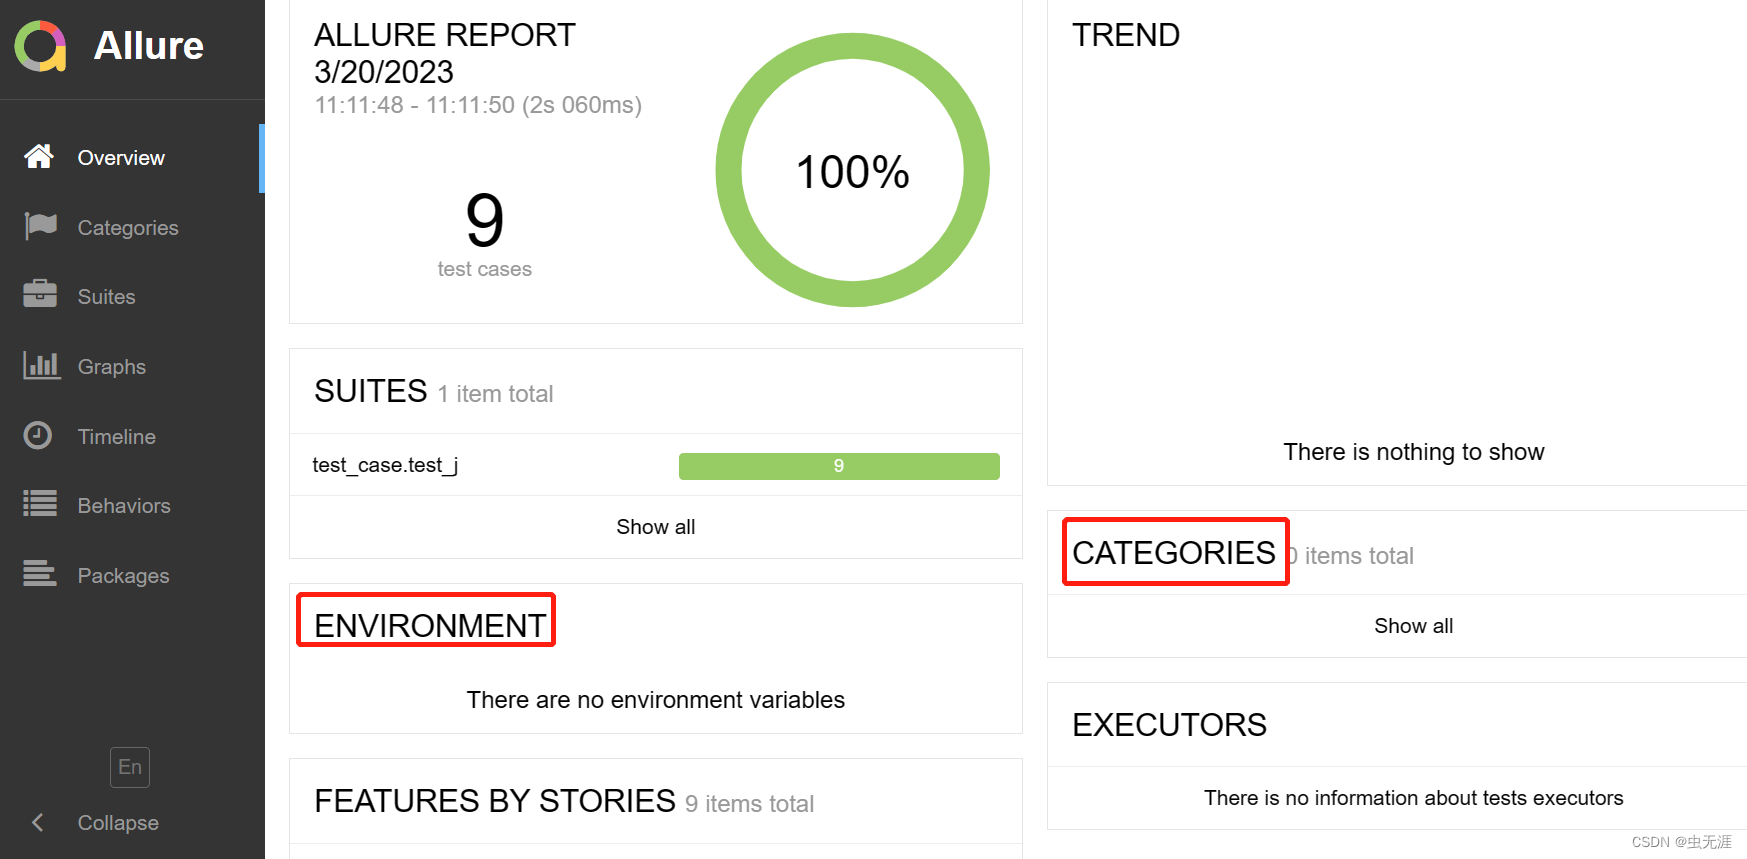
1 Environment设置
Environment可以理解为环境变量;- 默认为空;
- 可以自己设置。
1.1 设置方法
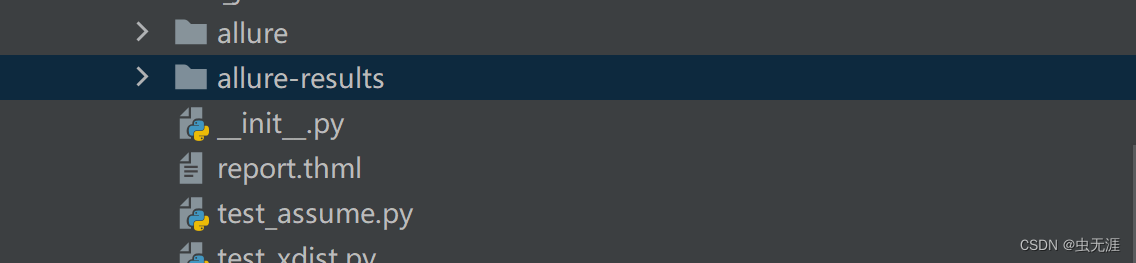
- 在存放测试报目录下创建
environment.properties或者environment.xml文件; - 而测试报告目录是使用
--alluredir指定的目录,比如:
--alluredir allure-results
- 比如之前提到的用例:
pytest -n auto --alluredir=allure-results test_xdist.py
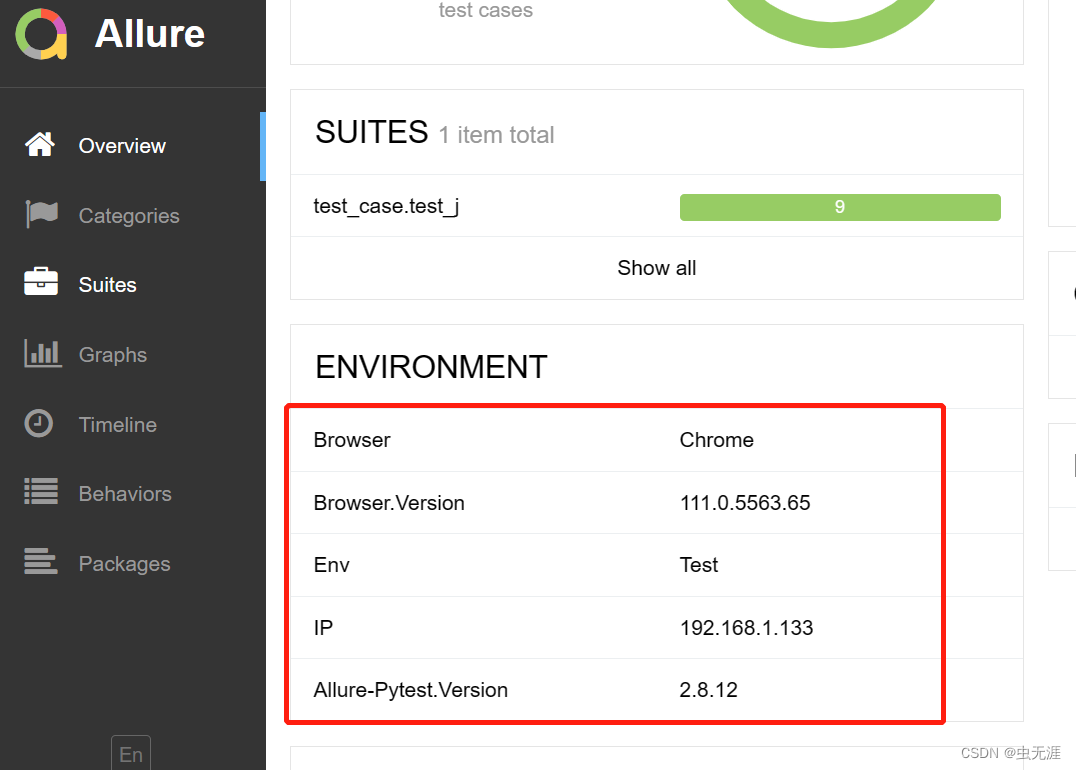
1.2 创建文件
environment.properties:
Browser=Chrome
Browser.Version=111.0.5563.65
Env=Test
IP=192.168.1.133
Allure-Pytest.Version=2.8.12
- 运行后查看
Environment:
- 或者创建
environment.xml:
environment>Browser Chrome Browser.Version 111.0.5563.65 Env Test IP 192.168.1.133 Allure-Pytest.Version 2.8.12 2 Categories设置
Categories即分类,测试用例结果的分类;- 默认有两种分类:
# Product defects 产品缺陷(测试结果:failed)
# Test defects 测试缺陷(测试结果:error/broken)
- 可以自定义分类。
2.1 设置方式
- 和
environment方式一样,在allure-results目录中创建categories.json文件
2.2 创建文件
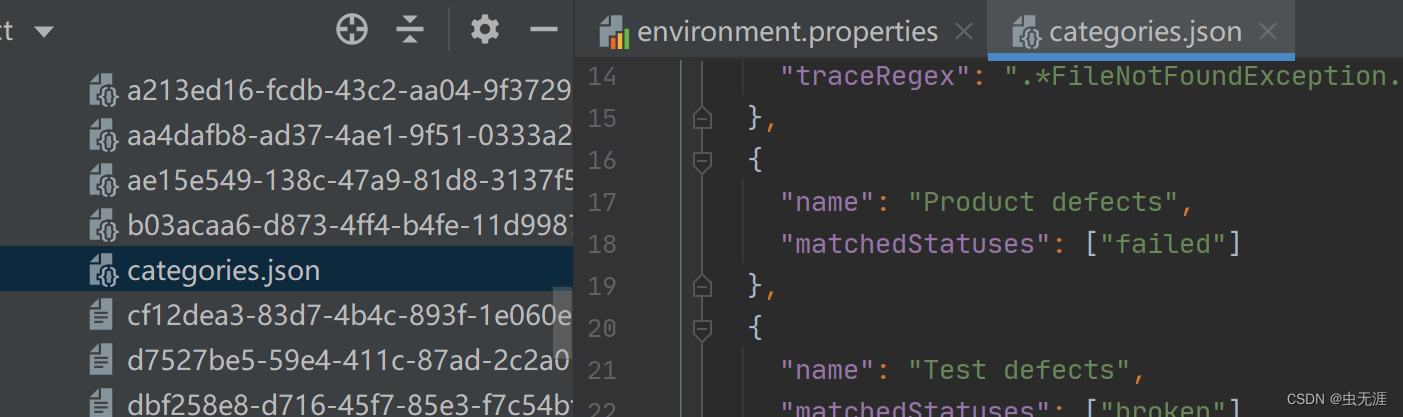
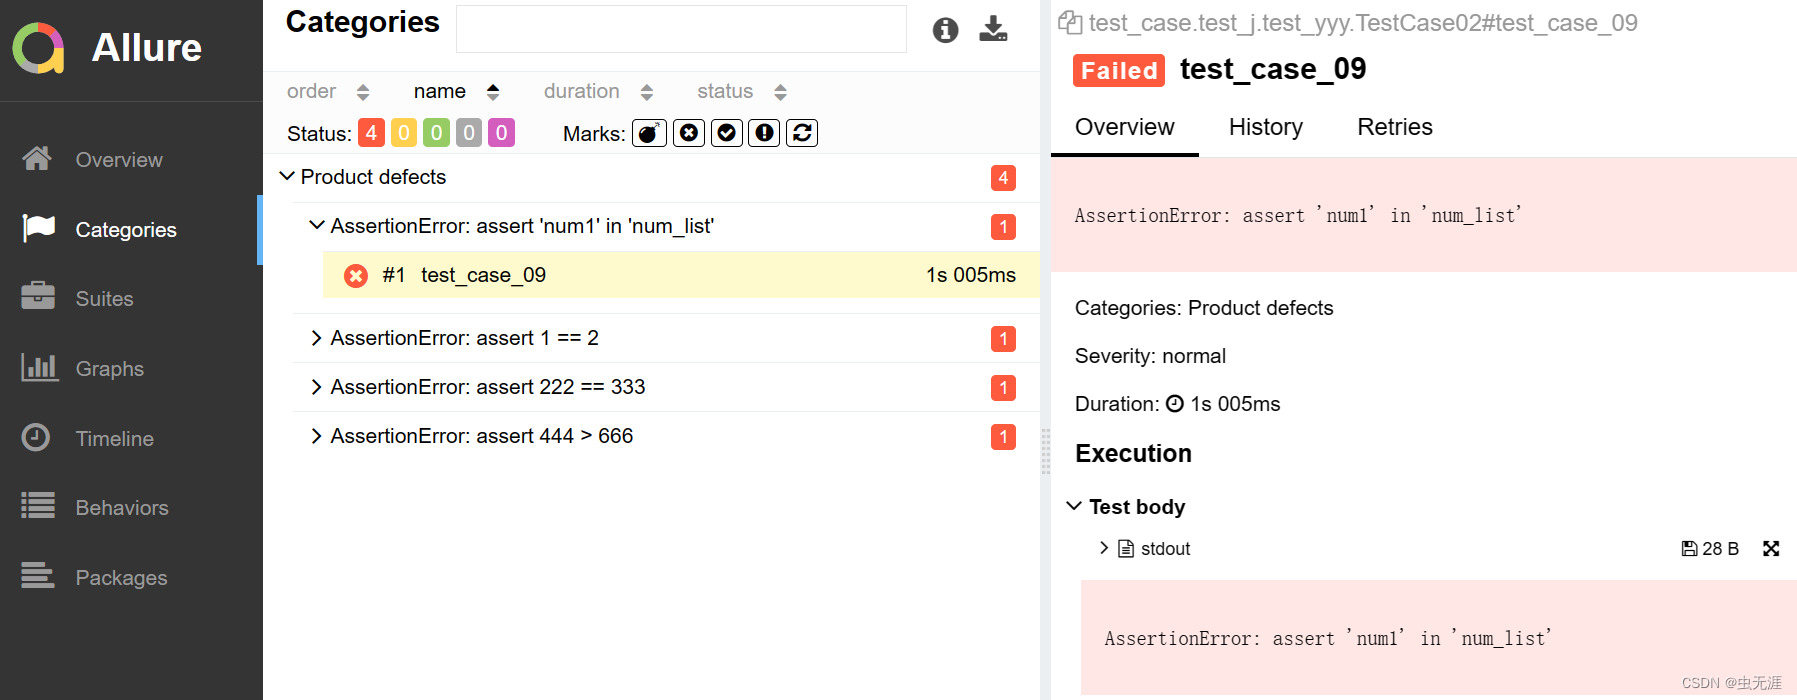
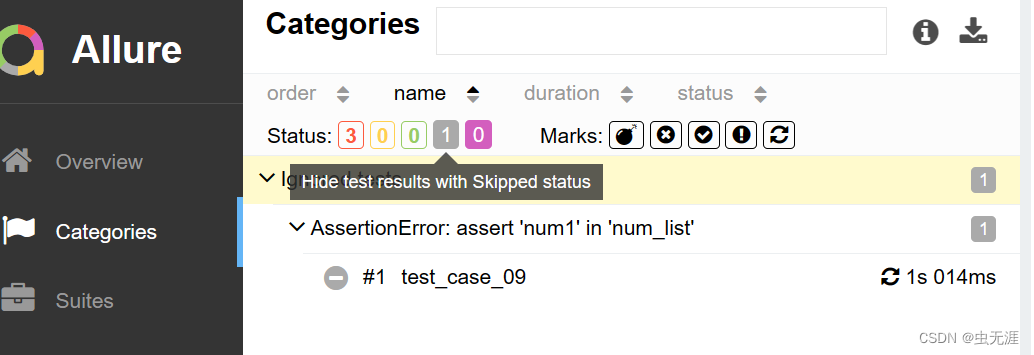
[{"name": "Ignored tests", "matchedStatuses": ["skipped"] },{"name": "Infrastructure problems","matchedStatuses": ["broken", "failed"],"messageRegex": ".*bye-bye.*" },{"name": "Outdated tests","matchedStatuses": ["broken"],"traceRegex": ".*FileNotFoundException.*" },{"name": "Product defects","matchedStatuses": ["failed"]},{"name": "Test defects","matchedStatuses": ["broken"]}
]
- 参数说明:
name:分类名称
matchedStatuses:测试用例的运行状态,默认["failed", "broken", "passed", "skipped", "unknown"]
messageRegex:测试用例运行的错误信息,默认.* ,通过正则匹配
traceRegex:测试用例运行的错误堆栈信息,默认.*  ,通过正则匹配
- 写一个用例,验证下:
# -*- coding:utf-8 -*-
# 作者:虫无涯
# 日期:2023/3/20
# 文件名称:test_yyy.py
# 作用:allure特性categories验证
# 联系:VX(NoamaNelson)
# 博客:https://blog.csdn.net/NoamaNelsonimport pytest
import timeclass TestCase01():def test_case_01(self):time.sleep(1)print("case01$$$$$$$$$$$$$$$$$$$$$")assert 1 == 2def test_case_02(self):time.sleep(1)print("case02$$$$$$$$$$$$$$$$$$$$$")assert 3 == 3def test_case_03(self):time.sleep(1)print("case03$$$$$$$$$$$$$$$$$$$$$")assert "is" in "is_you"def test_case_04(self):time.sleep(1)print("case04$$$$$$$$$$$$$$$$$$$$$")assert 5 < 10def test_case_05(self):time.sleep(1)print("case05$$$$$$$$$$$$$$$$$$$$$")assert 222 == 333def test_case_06(self):time.sleep(1)print("case06$$$$$$$$$$$$$$$$$$$$$")assert 444 > 666class TestCase02():def test_case_07(self):time.sleep(1)print("case07$$$$$$$$$$$$$$$$$$$$$")assert 10/2 == 5.0def test_case_08(self):time.sleep(1)print("case08$$$$$$$$$$$$$$$$$$$$$")assert "num" in "num_list"def test_case_09(self):time.sleep(1)print("case08$$$$$$$$$$$$$$$$$$$$$")assert "num1" in "num_list"if __name__ == '__main__':pytest.main(["-s", "test_yyy.py"])- 运行命令:
pytest -n auto --alluredir=allure-results test_yyy.py- 运行命令:
allure serve allure-results
- 查看结果:
3 关于Flaky test
3.1 Flaky test介绍
Flaky test在被测对象和测试条件都不变的情况下,有时候失败、有时候成功的测试;- 实际上就是不稳定的测试,或者随机失败(随机成功)的测试;
- 标记成Flaky是为了当用例失败的情况下,我们能获取足够详细的信息。
3.2 产生Flaky Tests的原因
- 异步等待;
- 并发;
- 资源泄露;
- 远程服务;
- 测试依赖性。
3.3 Flaky安装
pip3 install pytest-ignore-flaky
C:\Users\Administrator>pip3 install pytest-ignore-flaky
Looking in indexes: https://pypi.tuna.tsinghua.edu.cn/simple
Collecting pytest-ignore-flakyDownloading https://pypi.tuna.tsinghua.edu.cn/packages/22/bf/4a670d28c8c37569e26536c068d83b37a01aea9fff9a45a03ae3be5344b9/pytest_ignore_flaky-2.0.0-py3-none-any.whl (3.9 kB)
Requirement already satisfied: pytest>=6.0 in d:\python37\lib\site-packages (from pytest-ignore-flaky) (6.2.4)
Requirement already satisfied: py>=1.8.2 in d:\python37\lib\site-packages (from pytest>=6.0->pytest-ignore-flaky) (1.10.0)
Requirement already satisfied: colorama in d:\python37\lib\site-packages (from pytest>=6.0->pytest-ignore-flaky) (0.4.4)
Requirement already satisfied: attrs>=19.2.0 in d:\python37\lib\site-packages (from pytest>=6.0->pytest-ignore-flaky) (20.3.0)
Requirement already satisfied: atomicwrites>=1.0 in d:\python37\lib\site-packages (from pytest>=6.0->pytest-ignore-flaky) (1.4.0)
Requirement already satisfied: iniconfig in d:\python37\lib\site-packages (from pytest>=6.0->pytest-ignore-flaky) (1.1.1)
Requirement already satisfied: importlib-metadata>=0.12 in d:\python37\lib\site-packages (from pytest>=6.0->pytest-ignore-flaky) (2.1.1)
Requirement already satisfied: toml in d:\python37\lib\site-packages (from pytest>=6.0->pytest-ignore-flaky) (0.10.2)
Requirement already satisfied: packaging in d:\python37\lib\site-packages (from pytest>=6.0->pytest-ignore-flaky) (20.8)
Requirement already satisfied: pluggy<1.0.0a1,>=0.12 in d:\python37\lib\site-packages (from pytest>=6.0->pytest-ignore-flaky) (0.13.1)
Requirement already satisfied: zipp>=0.5 in d:\python37\lib\site-packages (from importlib-metadata>=0.12->pytest>=6.0->pytest-ignore-flaky) (1.2.0)
Requirement already satisfied: pyparsing>=2.0.2 in d:\python37\lib\site-packages (from packaging->pytest>=6.0->pytest-ignore-flaky) (2.4.7)
Installing collected packages: pytest-ignore-flaky
Successfully installed pytest-ignore-flaky-2.0.0
3.4 Flaky使用
- 再写一个用例:
# -*- coding:utf-8 -*-
# 作者:虫无涯
# 日期:2023/3/20
# 文件名称:test_yyy.py
# 作用:allure特性categories验证
# 联系:VX(NoamaNelson)
# 博客:https://blog.csdn.net/NoamaNelsonimport pytest
import timeclass TestCase01():def test_case_01(self):time.sleep(1)print("case01$$$$$$$$$$$$$$$$$$$$$")assert 1 == 2def test_case_02(self):time.sleep(1)print("case02$$$$$$$$$$$$$$$$$$$$$")assert 3 == 3def test_case_03(self):time.sleep(1)print("case03$$$$$$$$$$$$$$$$$$$$$")assert "is" in "is_you"def test_case_04(self):time.sleep(1)print("case04$$$$$$$$$$$$$$$$$$$$$")assert 5 < 10def test_case_05(self):time.sleep(1)print("case05$$$$$$$$$$$$$$$$$$$$$")assert 222 == 333def test_case_06(self):time.sleep(1)print("case06$$$$$$$$$$$$$$$$$$$$$")assert 444 > 666class TestCase02():def test_case_07(self):time.sleep(1)print("case07$$$$$$$$$$$$$$$$$$$$$")assert 10/2 == 5.0def test_case_08(self):time.sleep(1)print("case08$$$$$$$$$$$$$$$$$$$$$")assert "num" in "num_list"@pytest.mark.flakydef test_case_09(self):time.sleep(1)print("case08$$$$$$$$$$$$$$$$$$$$$")assert "num1" in "num_list"if __name__ == '__main__':pytest.main(["-s", "test_yyy.py"])- 使用命令直接运行用例:
pytest -n auto --alluredir=allure-results test_yyy.py
========================================== short test summary info ===========================================
FAILED test_yyy.py::TestCase01::test_case_06 - assert 444 > 666
FAILED test_yyy.py::TestCase01::test_case_01 - assert 1 == 2
FAILED test_yyy.py::TestCase01::test_case_05 - assert 222 == 333
FAILED test_yyy.py::TestCase02::test_case_09 - AssertionError: assert 'num1' in 'num_list'
==================================== 4 failed, 5 passed, 1 rerun in 5.99s ====================================
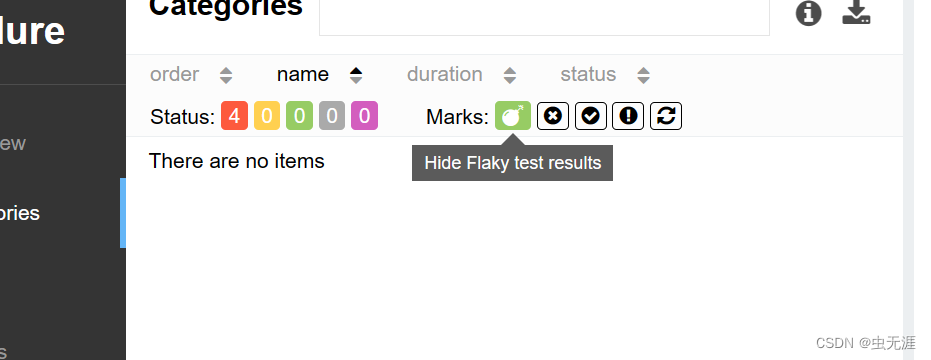
- 从上发现被我们使用
@pytest.mark.flaky标记的用例,断言是失败的,也正常标准失败:
- 命令行加上代码:
--ignore-flaky重新运行:
pytest -n auto --alluredir=allure-results test_yyy.py --ignore-flaky

- 发现被标记的用例变成了
xfailed而不是失败了:
3.5 小结
小结1
- 默认情况下,
@pytest.mark.flaky装饰器标记的测试用例默认会执行; - 当用例执行结果成功时正常执行正常显示用例结果;
- 当用例执行结果失败时,测试用例默认失败重跑一次。
小结2
pytest命令行参数--ignore-flaky运行@pytest.mark.flaky标记的测试用例:当用例执行成功时执行结果显示正常;- 当用例执行失败时执行结果显示
XFAIL(skip flaky test failure)。
相关内容
热门资讯
linux入门---制作进度条
了解缓冲区 我们首先来看看下面的操作: 我们首先创建了一个文件并在这个文件里面添加了...
C++ 机房预约系统(六):学...
8、 学生模块 8.1 学生子菜单、登录和注销 实现步骤: 在Student.cpp的...
JAVA多线程知识整理
Java多线程基础 线程的创建和启动 继承Thread类来创建并启动 自定义Thread类的子类&#...
【洛谷 P1090】[NOIP...
[NOIP2004 提高组] 合并果子 / [USACO06NOV] Fence Repair G ...
国民技术LPUART介绍
低功耗通用异步接收器(LPUART) 简介 低功耗通用异步收发器...
城乡供水一体化平台-助力乡村振...
城乡供水一体化管理系统建设方案 城乡供水一体化管理系统是运用云计算、大数据等信息化手段...
程序的循环结构和random库...
第三个参数就是步长 引入文件时记得指明字符格式,否则读入不了 ...
中国版ChatGPT在哪些方面...
目录 一、中国巨大的市场需求 二、中国企业加速创新 三、中国的人工智能发展 四、企业愿景的推进 五、...
报名开启 | 共赴一场 Flu...
2023 年 1 月 25 日,Flutter Forward 大会在肯尼亚首都内罗毕...
汇编00-MASM 和 Vis...
Qt源码解析 索引 汇编逆向--- MASM 和 Visual Studio入门 前提知识ÿ...
【简陋Web应用3】实现人脸比...
文章目录🍉 前情提要🌷 效果演示🥝 实现过程1. u...
前缀和与对数器与二分法
1. 前缀和 假设有一个数组,我们想大量频繁的去访问L到R这个区间的和,...
windows安装JDK步骤
一、 下载JDK安装包 下载地址:https://www.oracle.com/jav...
分治法实现合并排序(归并排序)...
🎊【数据结构与算法】专题正在持续更新中,各种数据结构的创建原理与运用✨...
在linux上安装配置node...
目录前言1,关于nodejs2,配置环境变量3,总结 前言...
Linux学习之端口、网络协议...
端口:设备与外界通讯交流的出口 网络协议: 网络协议是指计算机通信网...
Linux内核进程管理并发同步...
并发同步并发 是指在某一时间段内能够处理多个任务的能力,而 并行 是指同一时间能够处理...
opencv学习-HOG LO...
目录1. HOG(Histogram of Oriented Gradients,方向梯度直方图)1...
EEG微状态的功能意义
导读大脑的瞬时全局功能状态反映在其电场结构上。聚类分析方法一致地提取了四种头表面脑电场结构ÿ...
【Unity 手写PBR】Bu...
写在前面 前期积累: GAMES101作业7提高-实现微表面模型你需要了解的知识 【技...